
Watering
___________________________
Watering Techniques
Water is a crucial requirement for plants to thrive. They need it to photosynthesize! But watering can be a tricky process. How do you know when to water and how much? Here are some of my tips and tricks to make watering easier.

A More Natural Cycle
___________________________
There are many misconceptions that watering should maintain a certain soil moisture or a plant should be watered so many times a week. However, what is best for the plants is maintaining a Wet-Dry Cycle like they would have in their natural environment. Often times it doesn’t rain every day for these plants in the wild and their roots are not built to rely on a certain timing for their water.
Instead, watering deeply and thoroughly when your plants are ready, and then allowing the plants to dry over time promotes healthier roots and thriving plants!
A Baking Check
___________________________
The two key things to successful watering are Frequency and Consistency.
Frequency is based on how often you water a plant. And Consistency is about watering your plants right when they are ready, no sooner and no later.
But how do you tell when your plant is ready and how often you should water?
A quick Baking Check!
A good friend of mine gave me a wonderful analogy for how to tell when your plant is ready to be watered and all you need is your finger and a bit of baking knowledge.
When checking the moisture content of the soil, stick your finger inside the soil up to your first knuckle if you can. You are looking for your soil to not feel wet, but not fully dry either. You want it to feel slightly damp. Enough so that it sticks to your finger a bit, but can easily rub or flake off.
As for our baking knowledge, here is my friend’s soil moisture analogy:
If it feels like Brownie Batter, it’s too wet.
If it feels like Cake Mix, it’s too dry.
If it feels like Bread Dough, that’s just right!
Your watering Frequency will be based on how often your plants are ready for water. Whenever your plant passes the Baking Check, you should water it that day.
When you water your plants on time they will absolutely thrive!
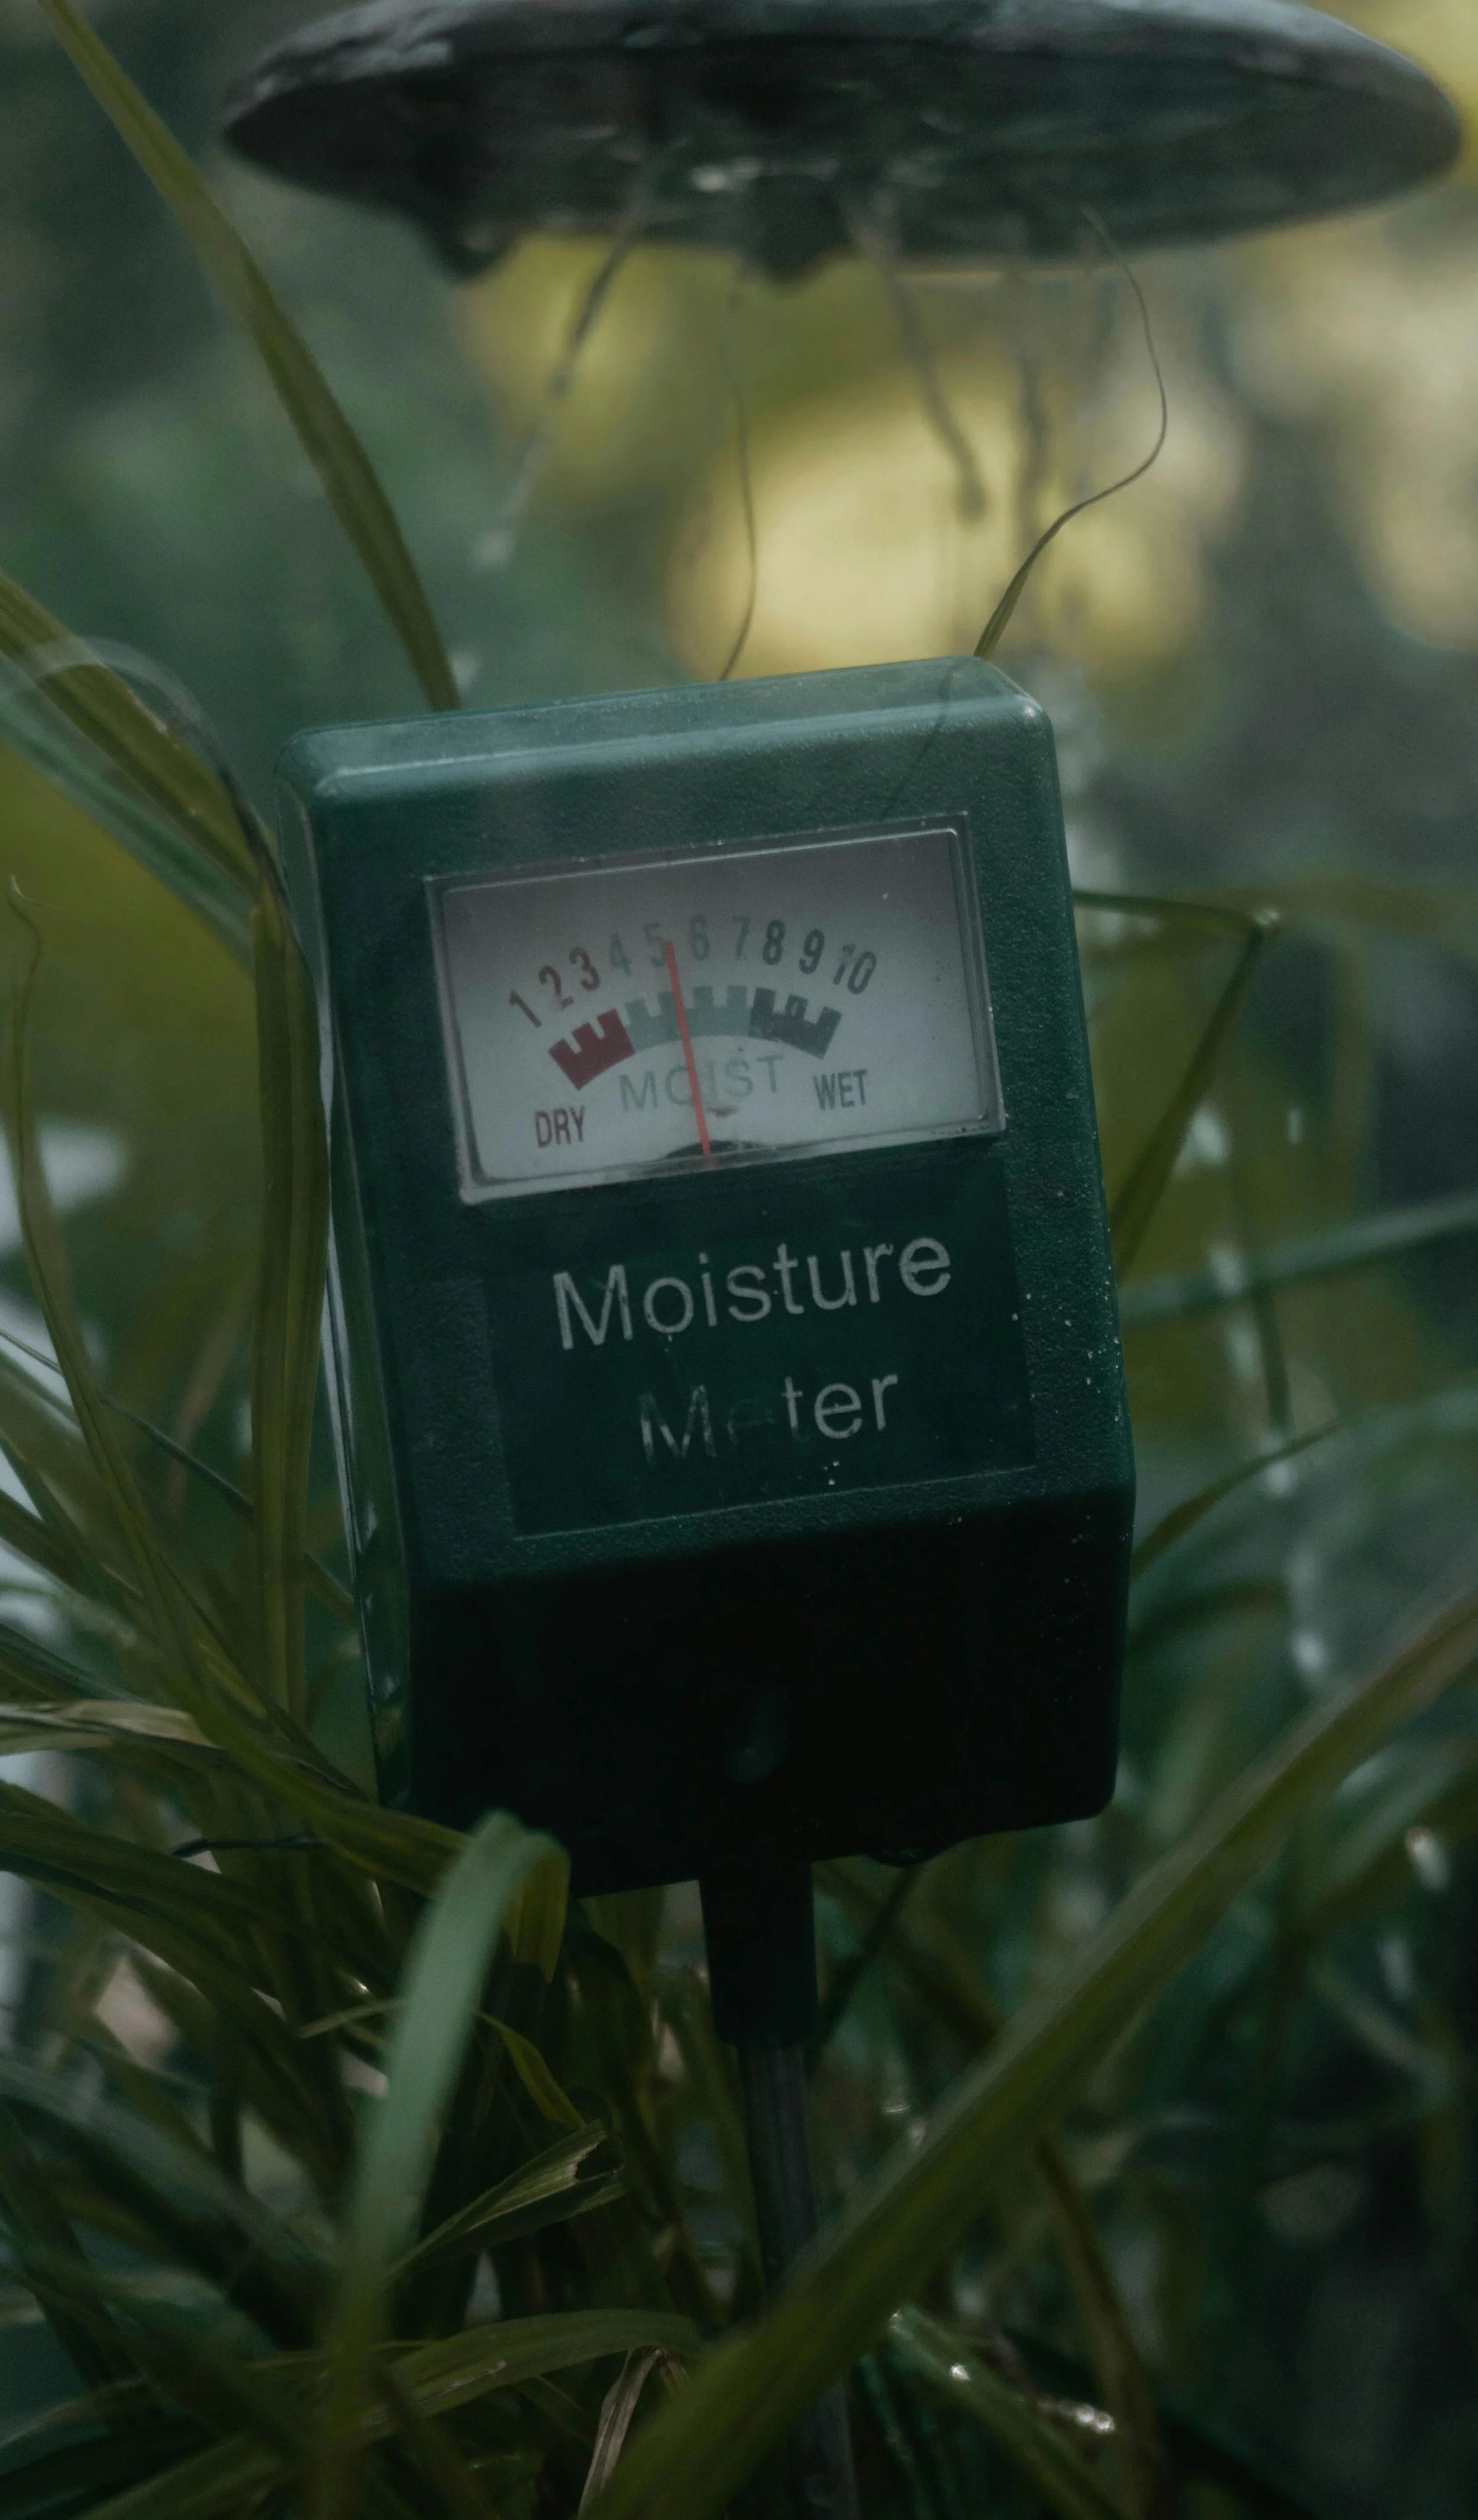
Note: Moisture Meters can also be used to determine your plant’s water readiness. I will go into more detail about these in the next section!

Moisture Meters
___________________________
While nothing beats using your finger, sometimes that can be hard when you are first starting out. Moisture Meters are a great tool for beginners to get to know your soil moisture content. I recommend using them alongside your finger so you can learn what a ready plant feels like, but have some numbers to back it up.
When using a Moisture Meter, you need to be gentle. They have a metal tip that reads the soil moisture content and those tips can be very sensitive and are easily damaged if not handled carefully.
Place the meter tip into the pot so it is fully in the soil. Be careful not to force it in too hard because you can damage the meter tip or puncture the plant roots.
It should only take a second for the red bar to settle on the moisture spectrum. The ideal moisture level is a 3-4. If it is less than a 3 it is too dry and should be watered right away. Higher than a 4 is too wet and you should wait to water.
Note: When checking soil moisture, whether with your finger and especially with a Moisture Meter, you should check multiple spots in the pot to get an average moisture reading. Also make sure to wipe off your instrument (meter or finger) in between readings to get a more accurate number.
Here I will bring back our Backing Check and give the Moisture Meter readings for reference.
Baking Check:
Brownie Batter: 4+ Moisture Meter Reading, too wet
Cake Mix: 3- Moisture Meter Reading, too dry
Bread Dough: 3-4 Moisture Meter Reading, just right!
Note: As mentioned before, you should use a Moisture Meter as a companion to your Finger. This will help you become familiar with your plants’ soil moisture and eventually become independent of the meter.
___________________________
A Schedule
The only way to make sure you water your plants every time they are ready (and maintain your sanity) is to have a Schedule.
This is especially essential when you have lots of plants.
I have over 200 plants, so checking them all each day is not feasible and takes a ton of time! Before my husband came along, I would just notice when plants were dry or wilting and then I would water them sometime after that. I often would put off watering because I knew it would take forever to water them all and I felt I didn’t have the time to check everything.
But this created so much stress for me and my plants because they were not receiving the water they needed and I always felt bad for not taking care of them like I should.
Then, my husband had an amazing idea to make a schedule of the plants that need to be checked each day. It has saved me so much stress and allowed me to continue enjoying my plants instead of them being a burden.
Since switching to the Schedule, I have been able to water my plants on time and they are absolutely thriving! It also helps me stay on top of pests, because I interact with my plants on a regular basis and catch infestations early. (Check out my Pest Page for more info on how to manage Pests!)
To the right, I have a picture of the custom Schedule I created simply using a Google Calendar.
There are some apps for schedules which require less input to set up. But I have found these to be inaccurate for your individual plants and spaces and they are not as customizable.
The Google Calendar has worked the best for me as you can customize frequency and even track things like locations and pest plants to help you know what you are dealing with. You can also go back, once you’ve collected enough data, and see the watering trends for each individual plant, which can help you plan placement and watering in the future.
Note: Google Calendars are also easily shareable! So if you ever need someone to watch your plants, you can share your schedule with them so it is easy and not overwhelming.

Creating A Schedule
___________________________
To create a Schedule with Google Calendar, simply start by creating a new Calendar on a Google Account you can access on your phone. I named my Calendar “Watering Schedule.”
Note: You will need to download the Google Calendar App if it is not already present on your phone. You will also need to create a Google Account if you do not have one already.
Then, create an All-Day event for each of your plants. I have names for all my plants so I remember which one they are, but you do not have to. You can name each event whatever you would like as long as you can remember which plant it stands for.
Set your event to repeat a certain number of days - this is your Frequency. If you are unsure how many days to put, just make your best educated guess for the first one. I usually put 7-10 days as a good base for larger plants, and 4-5 days as a base for smaller plants.
Then, make sure to add a picture of each plant under attachments and its location in your house to the event description. That way other people can know which plant to reference and where it is located if they help you water.
Note: You can easily add photos to your Google Calendar by uploading them to your Drive after taking them. Then when you go to attachments, click “Recent” and they should be right there for you.
Other Note: You will also need to make each of these pictures viewable through their share feature, otherwise your helpers will not be able to see the photos even if you share the Calendar. This is easy to do as you add them to the Calendar. Once added, click “View”, then hit the 3 dots in the upper right corner, and click “Share”. Then change the access to “Anyone with the Link.” You will have to do this with every photo you upload, but it is worth it in the end, especially for those who do not know your plants as well as you do!
Note: I also like to color coordinate my plant events based on their location in my house, that way it is easy to tell where they are and you can check all the plants in one room without leaving. For example, the plant pictured here is in my Plant Room, so I have changed its event color to Sage so people know it is in the Plant Room.
Other Note: You can also add Pest Tracking to your Schedule. I like to denote this by placing a “P” in front of the event name along with a number representing how bad of an infestation I have: 1 for small, 2 for medium, and 3 for large and bad. Then, I make a note in the description under the plant’s location to indicate which pest I am dealing with. These things can always be removed once the pests are taken care of. Check out my Pest Page for more on how to manage pests!

___________________________
Using the Schedule
To use your new Google Calendar Watering Schedule, simply do a Baking Check on each plant that shows up for that day.
You can easily see all the plant events for a day by going to the 3 Bars in the upper left hand corner of you Calendar and then choosing the “Schedule” option.
When checking, if a plant is too wet, edit the event and move it back a few days (how many is based on how much longer you think it needs before it is ready) so you will come back and check it again later and not forget about it. Be sure to choose the “This and Following Events” option when you move the date. This keeps the Repeat Frequency accurate.
When a plant is too wet, you should also increase the Repeat Frequency based on how wet it is so you don’t always check it when it is too wet and not ready. If I check a plant and it is really wet, I may increase its frequency by 2-4 days, if it is only slightly too wet, I may not increase its repeat or only increase it by 1 day. My rule of thumb with this is increase its Repeat by the number of days I moved it minus 1.
For example (reference photos in this section): Lets say I check Bob today and he is still too wet, but I think he’ll be dry enough in 2 days. I will edit the event and move him from Tuesday to Thursday so I don’t water him today but will still be reminded in two days to check him again. He is also set to repeat every 5 days, but that is obviously too frequent. So, since I moved him back 2 days, I will increase his repeat by 1 day (2 moved days minus 1 = 1 repeat day). That way he will repeat every 6 days from now on.
If a plant is too dry, water it immediately and decrease its Repeat time based on how dry it feels. If it is really dry, I may decrease the repeat 2-3 days. If it is only slightly too dry, I would decrease it by 1 day.
For example: The plant used in the last section is set to repeat every 11 days, but it is too dry when I check it. If it is only slightly too dry, I will decrease the repeat time to 10 days. If it is really dry, I may go down to 7 or 8 days Repeat.
It is always better to check a plant and have it be too wet and push it back than to check a plant and have it be too dry. If I am unsure on the Frequency of a plant yet, then I will lean on the side of more Frequent - or less repeat days - to make sure the plant isn’t drying out too much.
If you check a plant and it is just right, just keep the event as is. It is on the right track!
Serious Note: Make sure that when you edit an event you then save it. And, as mentioned above, when you save it, make sure to click the “This and Following Events” option. This will keep the Repeat Frequency accurate. Do not chose the All Event option because that will change every event from the first one and throw off your Repeat.
This schedule is a lot more active than some people expect. It is constantly being updated every day and especially with the changing seasons. This is why I like using Google Calendar so much because it allows for this level of customization, but still keeps your plants happy by watering them on time.


Note: Your watering Repeat Frequency will change naturally with the seasons. Plants have more light in the Summer and thus use more water and will need to be checked and watered more frequently. Where as, there is less light in the Winter, and so you will go longer between checking and watering your plants during that season. As you transition between seasons you will notice the frequency change.
For example: When transitioning into Summer, you will often check your plants and they will be too dry. You’ll want to bump down your Repeat Frequency an extra bit during this time to account for the increasing light. And when transitioning into Winter, your plants will often be too wet when you check them, so you will be moving them back a lot and increasing their repeat days.
Remember it is still better to check a plant and have it be too wet than too dry, so take this into account as you are adjusting for the seasons.
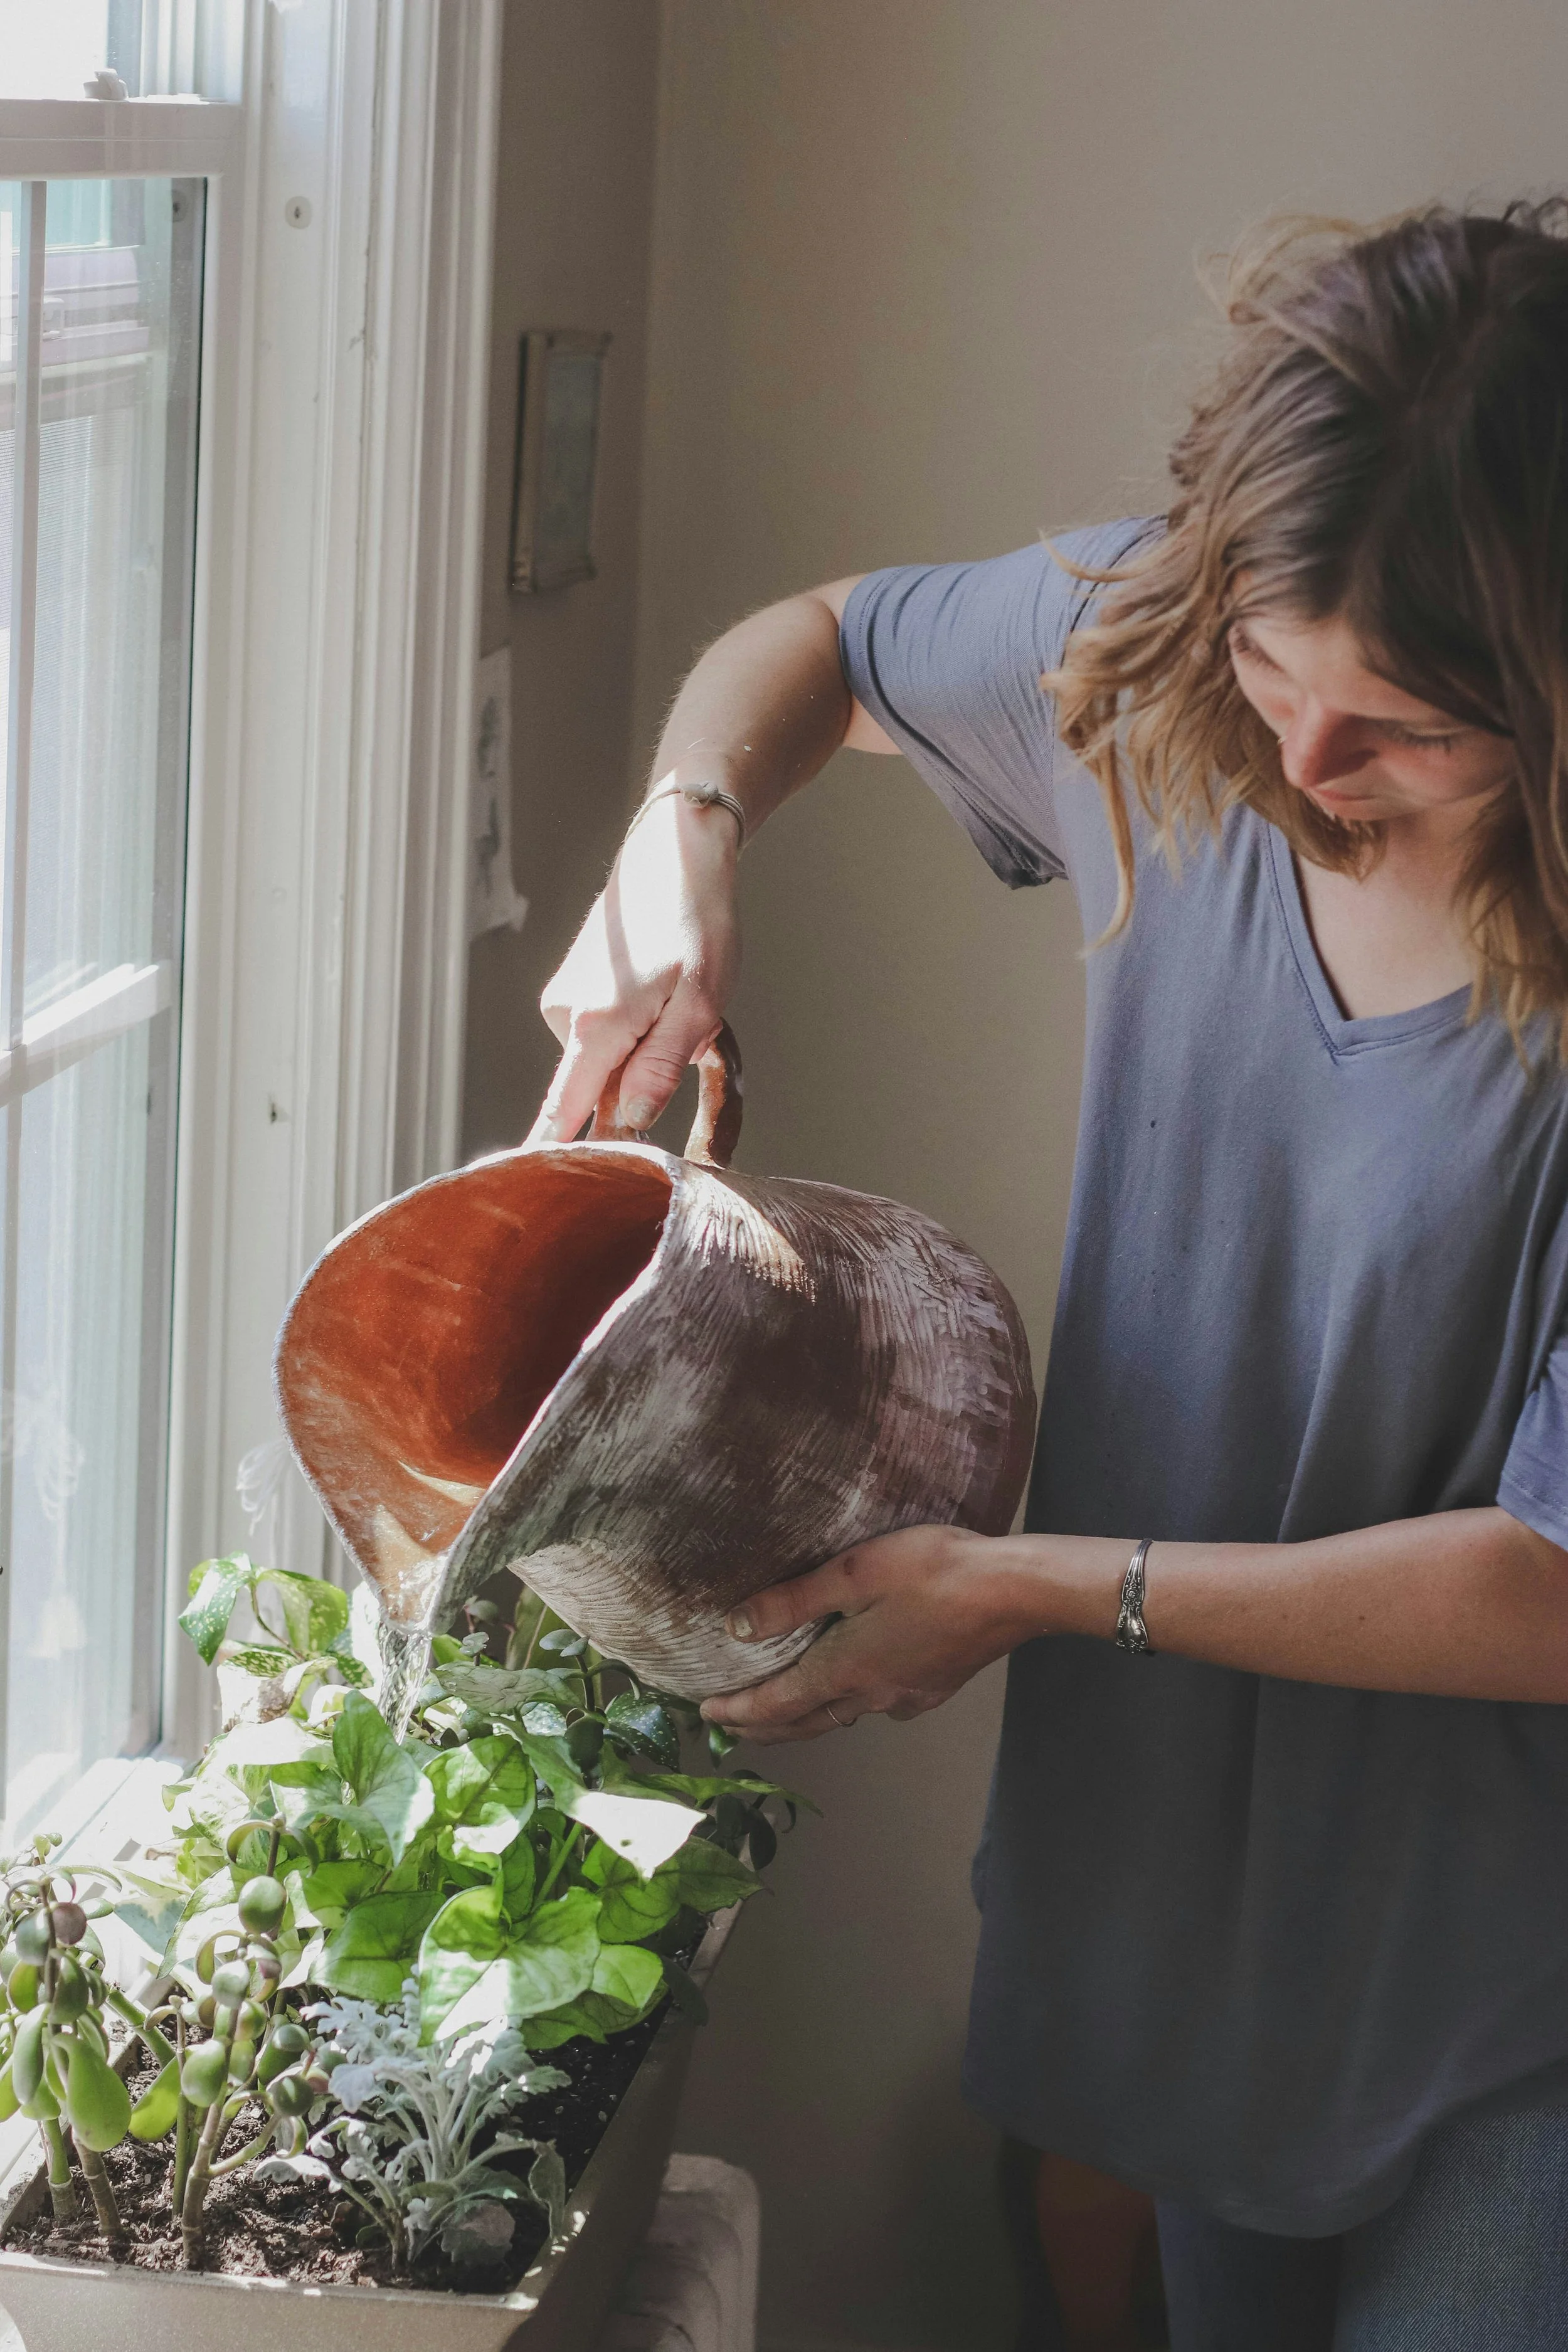
A Nice Shower
___________________________
Now that we’ve established when your plant is ready to water, let’s talk about how to water!
I always recommend spraying off your plants every time you water. This helps deter pests and keep your foliage clean so your plants can photosynthesize. Plus, it will increase your plants humidity for a little while.
Note: When watering plants, you should make sure to use warm water when you can. If the water is too hot or too cold for you, it is the same for you plants and could damage their roots.
If you cannot spray off your plants where they are, I would recommend watering them in the tub or shower during the winter months. I have a shower head that I can move around to spray the whole tub and each side of my plants.
You can also use a hose and water plants on your patio (as long as temperature allows, more on ideal plant temperature on my Temp & Humidity page!). Just make sure that you are doing it early in the morning, in the evening, or in the shade during the day so that they do not get scorched by the sun.
After you’ve rinsed your plants, water them with the nozzle pointed directly onto the soil when possible. Let the water pool for a bit (but don’t overflow the pot) and then move to a different plant and do the same. This allows the water to drain down into the soil for a bit. Then repeat this 3 times. This makes sure that the soil is thoroughly soaked and has absorbed as much water as possible.
Note: Potting soil becomes hydrophobic (water resistant) if it becomes too dry. You will notice it starting to shrink away from the sides of the pot. If you just water these soils lightly, they won’t absorb enough water to rehydrate and that will kill your roots. Make sure to water thoroughly every time.
After every plant is thoroughly watered, let them sit for a bit to allow them to drain any excess water. This will keep them from leaking onto your windows, floors, or furniture and ruining it. After they drain, you can return them to their homes for them to continue growing!
Note: Make sure that whatever pots your plants are in have drainage holes in the bottom, otherwise you plants won’t be able to get rid of their excess water. If your pot does not have drainage, you will have to manually dump out the excess water.
Note: You can leave your plants in the tub overnight to drain. Or, If you cannot do this, I would recommend waiting at least 20 minutes for your plants to drain and then putting any plant that does not have a cover pot or saucer on a towel for a few minutes before putting them away. The towel will soak up more of that excess water hanging out on the bottom of your pots so it doesn’t damage your home.

___________________________
All Set!
Phew! That was a lot! But I can guarantee that if you follow these tips, your plants will absolutely thrive! And you’ll even have some sanity to spare!
Proper watering is the most active and most important thing for when taking care of your plants. So many issues can come from incorrect watering, and, once you get the hang of it, it is super easy to overcome these issues.
Taking care of plants requires a lot of work, but it is worth it!
You guys got this! You’re all set for your watering success!

For more Basic Tips:
Head back to my General Care Page!